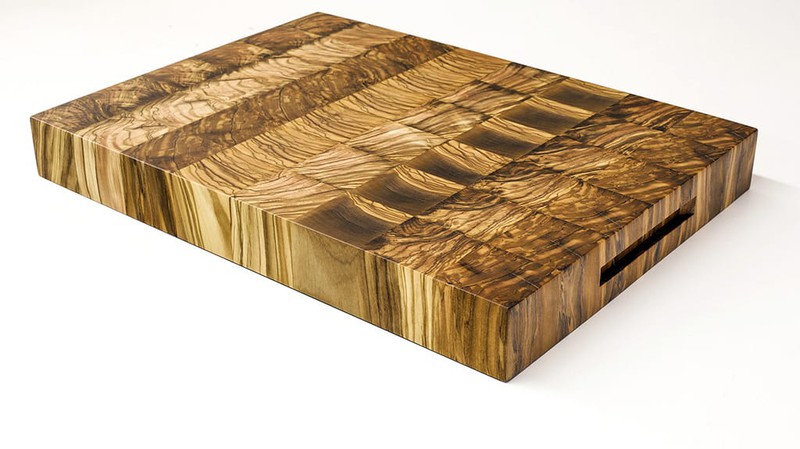
Make your own olive tree cutting board
You don't have to be an expert in the kitchen to know that having a good Olivo cutting board is essential. These boards are used to cut food safely and perfectly, because as they have a flat surface, they offer the stability needed to make all kinds of cuts, from julienne strips and sticks to slices and brunoise. In addition to this, the chopping board protects the table and extends the useful life of the knives.
Knowing how important it is to have a cutting board, you will surely want to buy one right away, but rest assured, it is not necessary to spend a fortune to get a high quality cutting board, fortunately, you can make one yourself, easily, quickly and cheaply.
Next, at Brycus Consejo we will teach you how to make an Olive cutting board step by step. Best of all, the tools and products you will need are available on our website and at excellent prices.

Before mentioning the steps to follow, it is important that you make sure you have the following tools and products:
• 8 squares of olive wood with the grain in the testa
• Tail
• Salt
• Turnstiles
• Hand brush
• Table saw
• Chisel
• Orbital sander
• Sandpaper P80
• Sandpaper P120
• Linseed oil or mineral oil
Once you have all this on the table where you will work, you can perform the following steps:
Step 1
The first thing to do is check that all the wooden squares are squared, that is, perfectly flat on each of their sides, in this way, they will coincide without problems with each other .
Step 2
Now you must decide which is the best orientation of the grain, you have to choose the one with the best appearance. In our example, we have chosen olive wood with the grain in the butt, because it is the most resistant, durable and the one that causes the least damage to the knife.
Step 3
Once the orientation of the grain has been defined, we will apply glue on the sides of the wooden squares and a little salt. The glue will hold the wooden squares together, and the salt will prevent them from moving in the next step.
Step 4
Once all the woods have been glued, pressure will be applied to them with long clamps or clamps for wood. This will ensure proper adhesion. Leave like this for 8 hours and then remove.
Step 5
With the help of a hand plane, all the faces of the wood are flattened. Then the wood is measured and marked according to the size that you want to give to the cutting board. With a table saw it is cut to obtain the desired dimensions.
Step 6
If you notice that the first gluing is not enough, because some wooden squares are loose, do not be afraid to disjoin them and re-glue them, sometimes a second application is essential.
Step 7
Once the drying process has finished, use a chisel to carefully remove the excess glue. Now, with the help of a calibrator, rectify that all the faces of the table are smooth and straight.
Step 8
With P80 sandpaper, and in a delicate way, smooth each one of the faces of the board, then change to P120 sandpaper for a perfect finish. Apply a little linseed oil or mineral oil over the entire board, let it dry and repeat the procedure. The oil will give the wood an elegant shine and make it more resistant.
Ready! It will be that easy to make your own Olivo cutting board for the kitchen. Check back soon for another Brycus tip.


Our customers trust us
Opinions of our clients
Receive our news