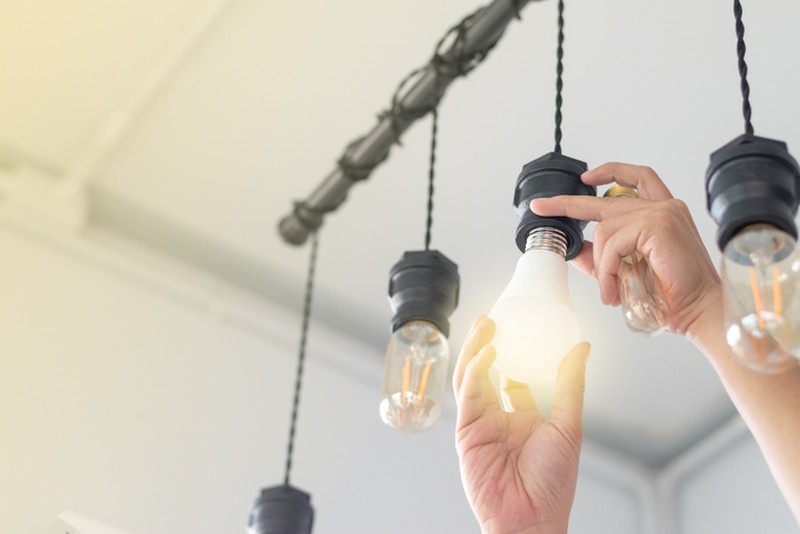
Replace the fluorescent tube with an LED
Do it yourself: how to replace a fluorescent tube with an LED
If you currently have a fluorescent tube installed, you can use the same lamp to connect the LED tube. However, you will have to make a simple modification.
Brycus tips tells you what steps to take to replace one technology with another. But first let's talk about the advantages of making this change.
What are the advantages of an LED tube over a fluorescent one?
When comparing the performance of LED tubes and fluorescent tubes, the former are the clear winners. This is due to the following reasons:
Durability. They have a lifetime of 50,000 hours, that is, five times more than their counterparts.
Resistance. They withstand shocks and vibrations better. And if they are damaged, they can be repaired, which is impossible for fluorescent lamps.
Consumption. The LED tubes come in 8 and 12 W versions. Fluorescents, on the other hand, can consume between three and four times that amount.
Speed. LED lamps light up immediately when the switch is pressed, unlike fluorescent lamps, which can take a few seconds to start.
Number of lights. The life of an LED tube is not reduced by the number of times you turn it on during the day. However, fluorescent tubes exhaust their use period with each start. The 10 000 hours of life promised by their manufacturers can be reduced if you light them more than twice a day, which is highly probable.
Safety. Fluorescent tubes contain mercury vapour. If this breaks down and the gas spreads through the air, it can be harmful to human health and the environment. LED lamps, on the other hand, do not need any gas to light up.
Visit our section of bulbs, where you will find a wide selection of LED lamps.
Learn how to change a fluorescent tube for a LED
You don't need to have advanced knowledge in technology to replace a fluorescent tube with an LED one. Just pay attention to the steps Brycus shows you below and get the right tools and materials. These include a wire stripper and cutter, a cleat and a screwdriver. Do you have them already? Let's get started, then.
1. Remove the fluorescent tube
Turn off the switch that powers the lamp and disconnect it. This will avoid the risk of electric shock. Then remove the fluorescent tube from the lamp.
2. Cancel the starter and ballast
Fluorescent tubes emit light thanks to the presence of a compound with light properties. It is a mixture of gases made up of mercury vapour (as mentioned above) and argon or neon.
Two devices are in charge of generating the necessary conditions for the gas inside the tube to be illuminated. The first is the primer, which produces a spark that raises the temperature inside the tube. The second is the reactance, which increases the electrical voltage from 220 to 1000 volts.
Since LED tubes work very differently from fluorescent tubes, they do not need a starter or a ballast. So you have to disconnect the wires that feed these devices. To do this, you will need a screwdriver.
3. Connect wires to the electric current
Unlike fluorescent tubes, which are connected to two tube holders, LEDs only need to make contact with one. Choose which one you'll use and connect it to the power supply.
To do this, you will have to cut and peel the wires of the current and the tube holder with the corresponding pliers. Now, you will have to join these wires with the help of the clamp and the screwdriver.
4. Mount the LED tube
Finally, place the LED tube in the lamp, making sure that it makes contact with the tube holder you left in place.
There you go, a ready-to-use LED lamp that will save you money on your electricity bill. Visit our section of bulbs to know the different models that we have at your disposal.
Other related articles
 Feb. 13, 2024
Become an expert in the cultivation of bonsai
Learn to take care of a bonsai with the recommendations that we … June 7, 2023
Can I put a pool on my terrace?
Given the imminent rise in temperatures, it is not surprising that you … June 6, 2023
What is the best brand for removable pools?
Installing a removable pool in the garden at home is one of … June 2, 2023
What is better, a tubular pool or an inflatable pool?
More and more houses have a private pool to cool off in … June 2, 2023
Our customers trust us
Opinions of our clients
Receive our news