How to make a beautiful and economical decorative staircase
A clean and functional home positively impacts the well-being of people. After all, what can be better than relaxing in your favorite room after a busy day? That is why it is important that you have a space with personality that invites you to be comfortable and without stress.
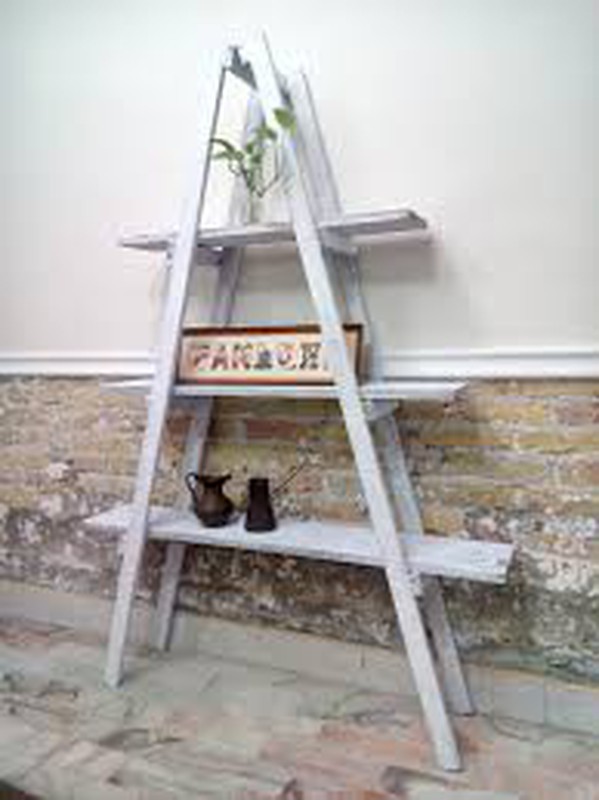
Although you think that saying it is easy - and that it is not so easy - you will be surprised to know that it is simpler than you think. Start by incorporating an element that connects you with nature and, at the same time, gives a twist to the environment, like an old restored staircase.
If you do not have one, do not worry! In this section of Brycus advice you can learn how to make your own decorative staircase with few steps and almost no budget.
Brycus advice: easy, fast and beautiful wooden staircase
You can make a nice decorative staircase with old woods, slats or trunks, what you like most! If you want a resistant structure that serves as an organizational shelf, you will need:
Materials:
Pencil
Ruler
Subway
Screws
Fixation brackets
Sander or hand-held sandpaper
Adhesive extra-resistant
Anti-slip pads
Rectangular pine wood slats
Coating for wood. It may be a varnish, but the lasur is the ideal
Tools:
keyhole saw
Driver drill
Brush or foam roller
Instructions:
First of all, determine the height, width and distribution of the rungs of the wooden ladder. You can make it symmetrical - with the same width steps - or asymmetric. Once you have done this, start with the step-by-step:
keyhole saw
Take two of the wooden slats. These will be the railings. Buy them thicker than the others for greater stability. With the help of the ruler and the pencil, draw a line slightly inclined at both ends of the slats. Take care that all the lines go in the same direction. With the jigsaw, cut the ends following the guide
one shelf every 25 cm
Measure the width of the steps in one or more strips and mark the guide with the pencil. Cut them all with the jigsaw and reserve. It is recommended that you put a shelf every 25 cm to leave enough space between the steps and leave at least 15 cm free at each end of the staircase.
electric sander
Grab the hand sander or your electric sander and run it through all the pieces of wood. Round the ends of the longer battens a little
With the brush or roller, apply the varnish or the lasur for the wood on each strip and wait for it to dry very well to continue
anti-slip pads
Glue the non-slip pads with adhesive on each end of the rails, even those that will face the wall
driver drill
It's time to put the ladder together. Fix each shelf using your brackets, screws and the drill driver. The squares must go in the lower part. Do it carefully so that the wood does not open
You already have your organizational wooden staircase! Put it in the place you want and enjoy a new space.
Its uses in decoration
* Use them as a decorative tool in the home or office to add color, depth and textures. With vases, a strip of lights, blankets or plants, you will have a cozy room!
* You do not have where to put your towels in the bathroom? Yes now! Use each shelf to store them and complete with a pair of decorative objects
* If you are a lover of gardening and you have your own urban garden, surround it with vines and place your irrigation implements on it
* Turn it into an organizational ladder for study! As it does not occupy space, you will not lose square meters and you will have an ideal place to put your favorite books, your photos or DIY materials
* Do you want a Brycus advice? Do not limit yourself! If you are going to have a party outdoors, make it part of the meeting. As it is beautiful and timeless, it will become a beautiful complement to the candy bar, in a photo call or in a corner for drinks.


Our customers trust us
Opinions of our clients
Receive our news