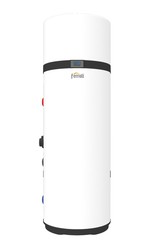
Aerothermal heat pump ACS EGEA Ferroli
Brand: Ferroli
Description
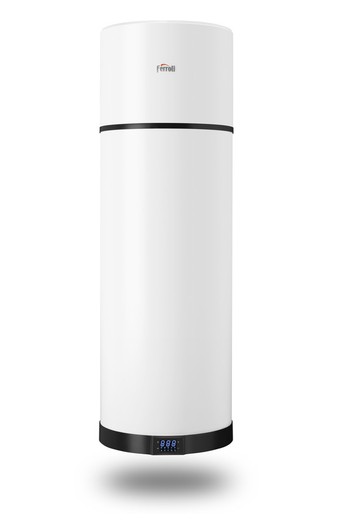
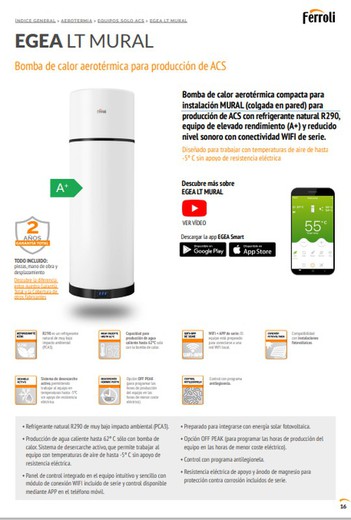
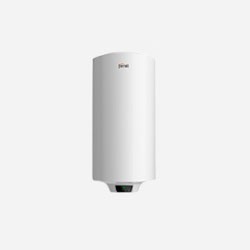
Compact aerothermal heat pump for WALL-MOUNTED installation (wall-hung) for the production of DHW with natural refrigerant R290, high performance equipment (A+) and low noise level with WIFI connectivity as standard. Designed to work with air temperatures down to -5 ºC without electrical resistance support.
Details
Technical characteristics
EGEA 90 LT
- Nominal capacity: 89 l
- Water heating efficiency (EU812/2013) (average climate): 107%
- SCOP DHW average climate (7 ºC (6 ºC)): 2.6(*)
- SCOP DHW hot weather (14ºC (13ºC)): 2.7(***)
- Heating time (average weather: 7ºC (6ºC)): 5:52(*) hh:mm
- Heating time (warm weather: 14 ºC (13 ºC)): 4:02(***) hh:mm
- Heating time in BOOST mode: 2:30(*) hh:mm
- Annual energy consumption (average climate): 479 KWh
- Sound power (Lw): 52 dB(A) < li>Maximum hot water capacity at 40 ºC: 98 l
- Maximum DHW temperature only with heat pump: 62 ºC
- Deposit dispersion: 40 W < li>Integrated heating element electrical power: 1200 W el
- Average absorbed electrical power: 270 W el
- Heat pump thermal power: 833 W th
- Maximum pressure water pressure: 7 bar
- Air temperature max. / min.: 43 / -5 ºC
- Nominal airflow: 190 m³/h
- Min. of stay required for installation of equipment: 15 m³
- Electric power supply: 230V - 50 Hz
- Protection class: IP - 24
- Refrigerant gas: R290
- Coolant GWP: 3
- Gas charge: 150 g
- Anti-legionella program: Automatic, included in control
- Anti-corrosion system: Magnesium anode
- Operation modes: Auto, Eco, Boost, Electric, Fan
- Weight: 60 kg
- Dimensions (height x width x depth): 138x51x52.7 cm
EGEA 120 LT
- Nominal capacity: 118 l
- Water heating efficiency (EU812/2013) (average climate): 112%
- SCOP DHW medium climate (7 ºC (6 ºC)): 2.7(*)
- SCOP DHW warm weather (14 ºC (13 °C)): 2.8(***)
- Heating time (average weather: 7 ºC (6 ºC)): 8:15(**) hh:mm
- Heating time (hot weather: 14 ºC (13 ºC)): 6:26(****) hh:mm
- Heating time in BOOST mode: 4:30(**) hh:mm
- Power consumption annual (average climate): 458 KWh
- Sound power (Lw): 52 dB(A)
- Maximum hot water capacity at 40° C: 128 l
- Maximum DHW temperature only with heat pump: 62 ºC
- Deposit dispersion: 46 W
- Integrated heating element electrical power: 1200 W
- Average electrical power absorbed: 270 W on
- Heat pump thermal power: 833 W th
- Maximum water pressure: 7 bar
- Air temperature max. / min.: 43 / -5 ºC
- Nominal airflow: 190 m³/h
- Min. of stay required for equipment installation: 15 m³
- Electric power supply: 230V - 50 Hz
- Protection class: IP - 24
- Refrigerant gas: R290
- Refrigerant GWP: 3
- Gas charge: 150 g
- Antilegionella program: Automatic, included in control
- Anti-corrosion system: Magnesium anode
- Operation modes: Auto, Eco, Boost, Electric, Fan
- Weight: 70 kg
- Dimensions (height x width x depth): 153x51x52.7 cm
Useful guide to install a thermos at home:
1. Mark the exact position of the flask with a pencil or marker
The places where you want to place your electric water heater must be precisely marked. Mark the fixing points with a pencil. Once this is done you can proceed safely to make the holes in the wall to place the new thermos.
2. Choose a suitable drill
The drill that you must use here has to be the diameter of the plugs. And once the holes are made, all that remains is to fit the plugs. If you need it, you can help yourself with a hammer to introduce them.
3. Seal the hot water intake pipe
We insert the screws into the plugs and tighten them well so that they are well fixed. Then we seal the hot water intake tube to prevent leaks. You can use a reducing fitting to fit the valve to the wall pipe, since they do not have the same diameter.
4. Seal the threads with the sealing thread
After placing the thermos to the hot water intake and fixing it correctly, we will use the sealing thread. It is not mandatory, but it is another of our Brycus tips to prevent water loss. All threads should be sealed.
5. Put the brass bushings
Now it's time to screw both hoses. On this occasion, a weld is made using a filler metal, so we will use brass bushings. Once the task is finished, it is recommended to sand the joint area. Furthermore, a stripper can be used to prevent rust.
6. Place the sleeves
This structure must be fixed to the cold water intake, again through a good welding. An electrolytic sleeve is then placed on this socket to prevent corrosion.
7. Join hose and valve
To join the sleeve with the valve we will use a male-male bushing. And we will place another sleeve in the other entrance, the hot water one. Check that they are well joined before moving on to the next step.
8. Now it's the turn of the hoses
Essential for the operation of the thermos. They must be perfectly connected to the joints. And we already took the opportunity to place a tube to be able to empty the thermos easily. Its place is at the outlet of the safety valve.
9. paint the tubes
And it can now be painted to improve its aesthetics! If you want it to go unnoticed, it is best to paint the tubes the same color as the walls of your house. It will go completely unnoticed.
10. Check that it works correctly
Now it only remains to check if it works correctly! Turn on the thermos and enjoy hot and cold water. Good job!
Videos (1)

Comments
Questions (2)
Ik wil graag een warmtepompboiler bestellen kunt u ook op de factuur zetten dat het door u is geïnstalleerd zo dat ik de subsidie kan aanvragen. Ik hoor graag van u
We hebben geen spijt
Bonjour, Est il possible d'avoir le modele 260LT ref : 2COBA05F ainsi que son prix ? Merci par avance P.B
Bonjour,
La référence que vous indiquez est actuellement en stock et le prix est 2144, 00 euros.
https://www.brycus.es/bomba-de-calor-aerotermica-produccion-de-acs-egea-200-lt-ferroli-be473/
Nous restons à votre disposition et n'hésitez pas à nous contacter si vous avez des questions.
En vous souhaitant une bonne journée.
Cordialement,
Brycus
Best price
Find more products in
Our customers trust us

